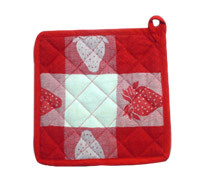
 Kitchen Pot Holders are one of the basic and most often used in every household kitchen. It is a perfect business to start in your own home because there is much less competition when it comes to hand-made kitchen pot holders. Start on making your own attractive and quality pot holders that will stand out in the marketplace.
How to make Kitchen Pot Holders
Materials needed:
- Fabric
- Cloth scraps to use as padding, such as old towels or blankets
- Thread
- Pre-folded bias tape
- Tape measure
- Ruler
- Pencil
- Scissors
- Needle
- Straight pins
Procedure:
- Cut your fabric—7 inches by 7 inches for the front section and 8 inches by 8 inches for the back.
- Layer the fabric together, with the back piece wrong side up, your padding material on top of that, and finally, the front piece right side up. Carefully, pin the three pieces together.
- Sew the three pieces together. “Quilt” the stacked layers together, sewing parallel rows of straight stitching about 1 inch apart across the square. Turn the square 90 degrees and stitch parallel rows again at right angles to the first lines of stitching, forming an allover quilted square pattern. Or, if desired, stitch diagonally to make quilted diamond shapes.
- Once the square is quilted, trim the edges as necessary, using a ruler and a pencil to form an even square. Or, for a round potholder, center an 8-inch plate on the quilted square and trace around it, carefully cutting off the marked corners.
- Finish the edges of the potholder with pre-folded bias tape. Starting at a corner, place the slightly wider side of the bias tape along the bottom edge of the pot holder, and fold the narrower side over the raw edges of the fabric.
- Be careful easing the tape around the corners of the pot holder, making sure not to overstretch the tape around corners or curves. Pin the tape into place as you go. At the end of the pot holder, leave 2.5 inches of extra tape.
- Beginning at the starting corner of the tape, stitch carefully over the thick-side of the tape, as close to the inside edge as possible. At the end of the pot holder, use the extra 2.5 inches to make a loop for hanging the holder. Continue stitching all along the extra tape, and then double the tape back and stitch its end to the edge of the potholder a few times for durability. The loop should lie at the corner of the pot holder.