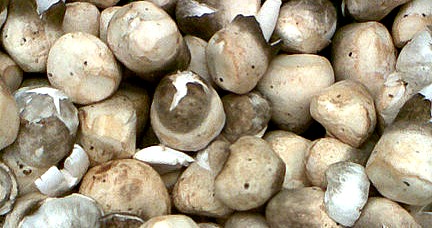
 The culture of mushroom is gaining popularity in the Philippines. Mushroom is a delicacy and is really accepted as vegetable. Its present cultivation in this country is limited, perhaps due to insufficiency of planting materials and the limited local knowledge about its culture.
Mushroom growing requires little space and time and farmers can make use of their rice straws following harvesting. Mushroom can be grown the whole year round provided a good storage of rice straw is prepared.
This article illustrates the fundamental techniques involved in the culture of banana or rice straw type of mushroom, Volvariolla volvacoa. The vegetable and Legume Crops Section of the Bureau of Plant Industry is now producing mushroom spawn in abundance.
Materials and Methods
Dry rice straws and banana leaves are the most common types of bleeding materials. However, other materials like cotton wastes, jute sacks, corn stalks, water hyacinth, sugar baggasse and abaca waste materials may also be used for bedding materials.
Sufficient water supply and soaking tank or any similar container are used. Plastic sheet of gauge No.6, empty cement bags and sacks are used to cover the beds.
Procedures
- Gather long, clean and well dried rice straws and banana leaves, preferably those that are still standing in the field. Avoid using old and contaminated bedding materials.
- Bundle the bedding materials 6-8 inches in diameter. If rice straws are used, arrange butt ends together.
- Cut the bundle materials 1.5 to 2 ft. long.
- Soak the bundled materials in water for at least 3 hours but not more than 10 hours until enough moisture is absorbed by the materials.
- Foundation as support for the bed.
- Set the soaked-bundled materials, closely knit the together, evenly and compactly.
- Water the bed well with the urea or ammonium sulfate at rate of 1-2 tbsp. per gallon of water. Add sugar at the rate of 33 grams per gallon of water to improve the yield of mushrooms.
- Press the layer to level of surface. Stop watering when the water starts to drip off the bed.
- Insert thumb-size prawns around the bed, four (4) inches from along the side and four (4) inches apart from each other. Never plant spawn at the middle of the bed.
- Set the second layer of straw on the top of the first layer. Put the butt ends together in two opposite direction. Water and press down. Follow the same procedure until a six-layer bed is attained.
- Cover the entire bed with plastic sheet gauges No. 6 or cement bags or sacks for seven days after which it is removed.
HARVESTING
The growth of mushrooms on the bed come in flushes. With adequate maintenance and care, the first flush usually comes and flushes from 13 to 15 days following seeding. When a flush is on watering must be avoided. Watering is resumed when the flush is over. Harvesting is done in the following manner:
- Harvest the whole mushroom including the stump. Don?t leave any stump in the bed as this would rot and in rotting the adjacent mushroom may be affected.
- As much as possible care must be taken not to disturb the small buttons.
- Mushrooms in the button stage of growth are more succulent, hence they are better preferred than the fully opened ones.
- Harvested mushroom may be placed in trays or in kaings.
Care in the Mushroom Bed
- When the bed is made, it may be well to cover it with plastic sheet, gunny sack or any suitable materials to protect it from the drying effect of the wind and to keep it humid.
- After the removal of the plastic sheet don?t water the bed as the bed is still wet.
- Watering should be done only in amounts, which would keep the surface moist and its environs humid.
- Watering may be done using a sprinkler, passing same over the bed and along the sides. Avoid soaking the bed as this condition is equally harmful to the proper development of the mushrooms as insufficient watering.
- When the mushroom buttons start to form, water must be stopped until the flush is over.
- Resume watering when the flush is over to coax another flush to come.
Photo: en.wikipedia.org